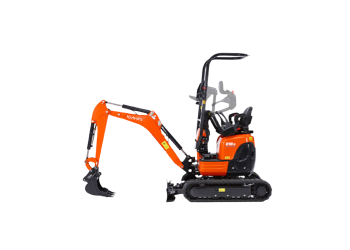

Repairing Mini Excavator Tracks
Changing rubber tracks
There are quite a number of steps to mini excavator tracks in an easy way, but you will be manpower and the right items to do it in efficiency and safety. Changing rubber tracks could finish by your own but having an additional hand would also be good. Continue reading, and into the time you will be back to work.
Move to safe area when repairing
Ensure that you are at a safe, spacious, and debris-free location during the initial repair process. Places with a flat surface would be a good idea.
Dozer blade
Continue, remove your tracks on the mid-air so you may begin to work. Revolve the house for having the dozer blade on beside of the boom. While it is time to pick up the mini excavator from pushing the dozer blade to the downward. Afterward, you may begin to make us of the boom and push the other machine upward. Excavator will then be footing on the machine blade and with the bloom with its roller being raised up.
More securely
Added security, especially if you are repairing on an unsure footing. Move to the jack underneath the carriage to lift the machine’s mass and maintain its original position. Move on, the next thing you should is to untighten the zerk fitting, with a spanner. Please mindful that different kind of model could be built in other ways. Therefore, you may check for the manual for safety reason.
Untightening the zerk fitting
The zerk fitting should be untightened to release stress from the zerk cylinder assembly, allowing the tension to remain on the idler wheel. You may be surprised when you are new to do the grease as it will let the grease out. When the zerk is off the cylinder. Assembly will then fall out and the idler roller will then pull back. The zerk fitting can be removed partially, especially when retraction is not feasible.
Advice: It is advice to leave a cube of wood in between the sprocket and track and place the track in reverse. From following this advice would help will your rubber track to be fully secured, and to pull your idler rearward.
Disassembly the rubber track
Continue, from this step, you will saw a tracks sag at the rollers. Disassembly the rubber track from the machine. Begin to pull the track from the idler edge. You may use pry bars to do this if you have the strength. In case it is possible. You may use forklift to securely pull it from tightening a chain with the rubber track.
Let move on. If the track is successfully disassembly from the idler edge. You may now freely move up to extract it from the operating outside area and the sprocket.
Inspect for disfigured
Next, at this point the rubber track is being extracted, you can now check for disfigured, scratches from the rollers, idlers, and sprockets. From the user manual which is placed at the machine producer will guide you on what to inspect. It is time to clean up the track frame from the mud, and the other dirty object, if you found no problem from the machine.
Replace or put back the rubber track
Next point, when the frame is carefully washed, you may choose to replace or put back the rubber track. To ensure proper tooth placement, move up the rubber track over the sprocket and slowly backward to slide the track to the idler, using a pry bar to avoid serious injuries.
Strengthening the zerk fitting
To tighten the rubber track, increase tension on the idler, strengthen the zerk fitting, and refill it until it hangs 1 to 2 inches from the middle roller.
Move on, forward the tracks and in rearward to inspect that the first-hand rubber track is suitably fit.
After inspecting
To tighten the rubber track, increase tension on the idler, strengthen the zerk fitting, and refill it until it hangs 1 to 2 inches from the middle roller.
When you are done, you may now start to control the mini excavator to do a demo for a short test to verify everything works smoothly and you are done after this step.
Worth of inspecting
Despite the time-consuming nature of inspections, it’s worth trying to make a wise decision before renting or buying a mini excavator, as mistakes can result in significant costs.
Having an inspection before renting or buying lower-cost excavators is crucial to ensure the machine’s normality and avoid significant cost responsibility.
To explore our full range of rental options, visit our excavator rental services. Additionally, learn more about our company solutions tailored to meet your specific project needs. Contact Us.


